


Looking for the real thing? Browse genuine ancient rings for sale — each piece one-of-one, individually authenticated, with provenance.
What a "ring ancient" means and why magnet tests come up
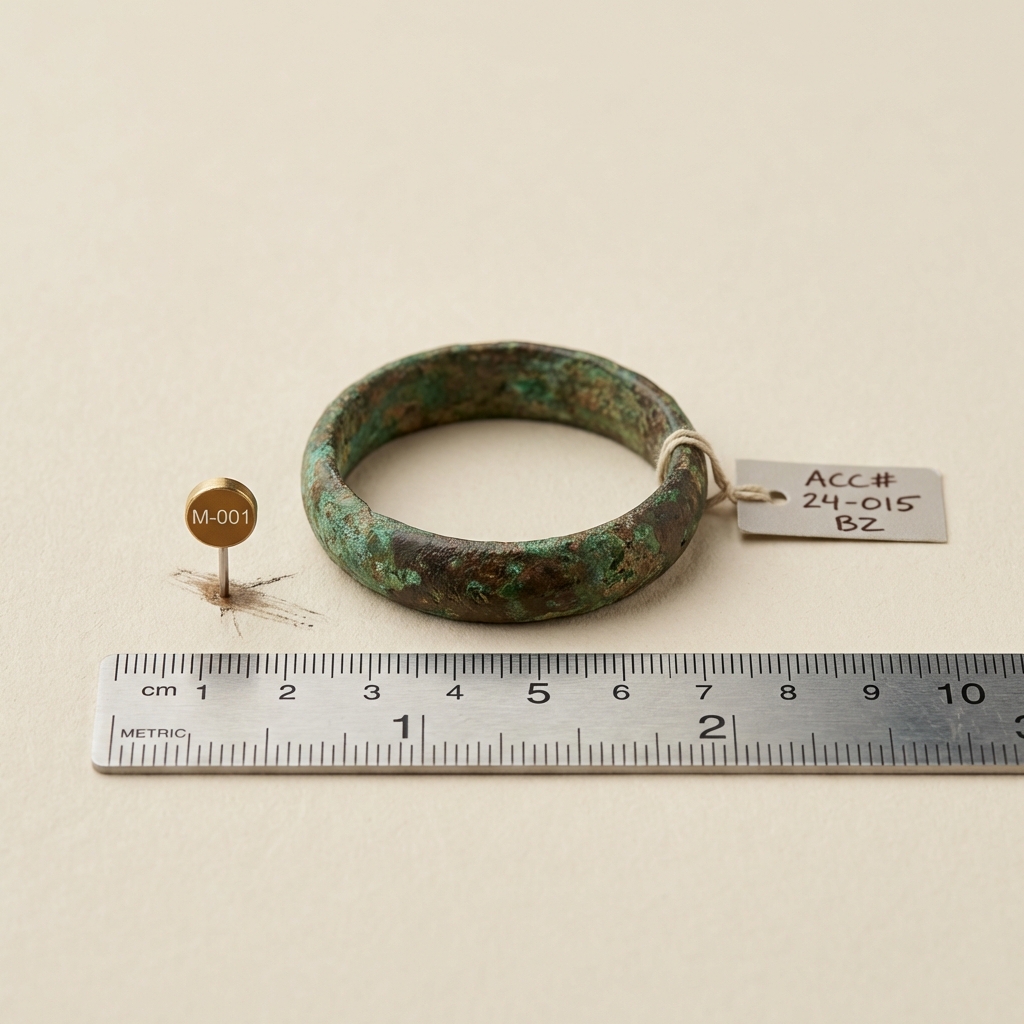
In collector language, an ancient ring is an object that originated in antiquity or the medieval period and is offered as an antiquity rather than a modern reproduction. The phrase signals interest in dating, workshop attribution, condition notes, and collection history rather than contemporary jewelry fashion.
Buyers often reach for a magnet because it is a quick way to check for obvious ferrous metal content. A small magnetic response can indicate iron or modern steel repairs, while an absence of attraction often matches expectations for non-ferrous metals such as gold or silver. That said, a magnet check is a limited diagnostic tool and should be treated as a first step, not a proof of age or provenance.
When assessing any piece, pair a magnet observation with the seller's documentation and condition notes. Photographs, measurements, and provenance details help turn a brief home test into useful context for a buying decision.

How magnetism and metals work in jewelry testing
At its simplest, magnetism in jewelry testing rests on whether a metal is ferromagnetic. Iron and many kinds of steel will be pulled to a magnet, while metals like gold and silver will not. This basic physics explains why a magnet test is suggested as an initial screen for obvious modern ferrous components.
Many metals used historically in rings behave predictably: bronze and copper alloys are not strongly magnetic in their usual states, while iron objects are. Ancient workshops used a range of materials, and later repairs may introduce magnetic steel. Alloys and corrosion products can complicate the picture, because oxidation or encrustation may change how a piece responds to a magnet.
For collectors, the practical consequence is that a magnet tells you something about metal composition but not directly about date or authenticity. It indicates presence or absence of ferrous material at the tested spot, and that information becomes meaningful only when combined with visual inspection and the item's restoration notes.
See magnet tests and documentation in action on @auroraantiqua
Download a one page quick magnet test checklist if you plan to test objects yourself, and read condition notes carefully before reaching any conclusions
What a magnet test can reliably tell you about an ancient ring
A positive magnet pull on a ring often reliably indicates ferrous metal at the tested area. That can mean the whole object has an iron component, or it can point to a localized modern repair or an inserted steel pin. Noting exactly where the magnet responds is essential: reaction at the bezel or hoop center suggests a structural element, while a pull only at a visible solder line points to a repair.
A negative magnet result does not prove age or authenticity. Gold and silver are non magnetic, and many genuine ancient rings are made from these metals or from non ferrous alloys. Likewise, some iron rich objects with heavy corrosion can register weakly or unpredictably, so absence of attraction is not a green light.
Surface conditions such as patina and encrustation can change magnetic behavior. For example, thick mineral encrustation can separate the magnet from the metal and reduce or remove an obvious pull. Repairs, later mounts, or modern additions may also introduce small steel components that produce a localized response while leaving the rest of the object unchanged.
Use magnet results as hypothesis points rather than conclusions. If a magnet reveals something unexpected, treat that observation as a prompt to seek more information in the seller's restoration notes or to request further testing such as X ray fluorescence or imaging.
Safe step-by-step magnet tests for a ring ancient (do this first)
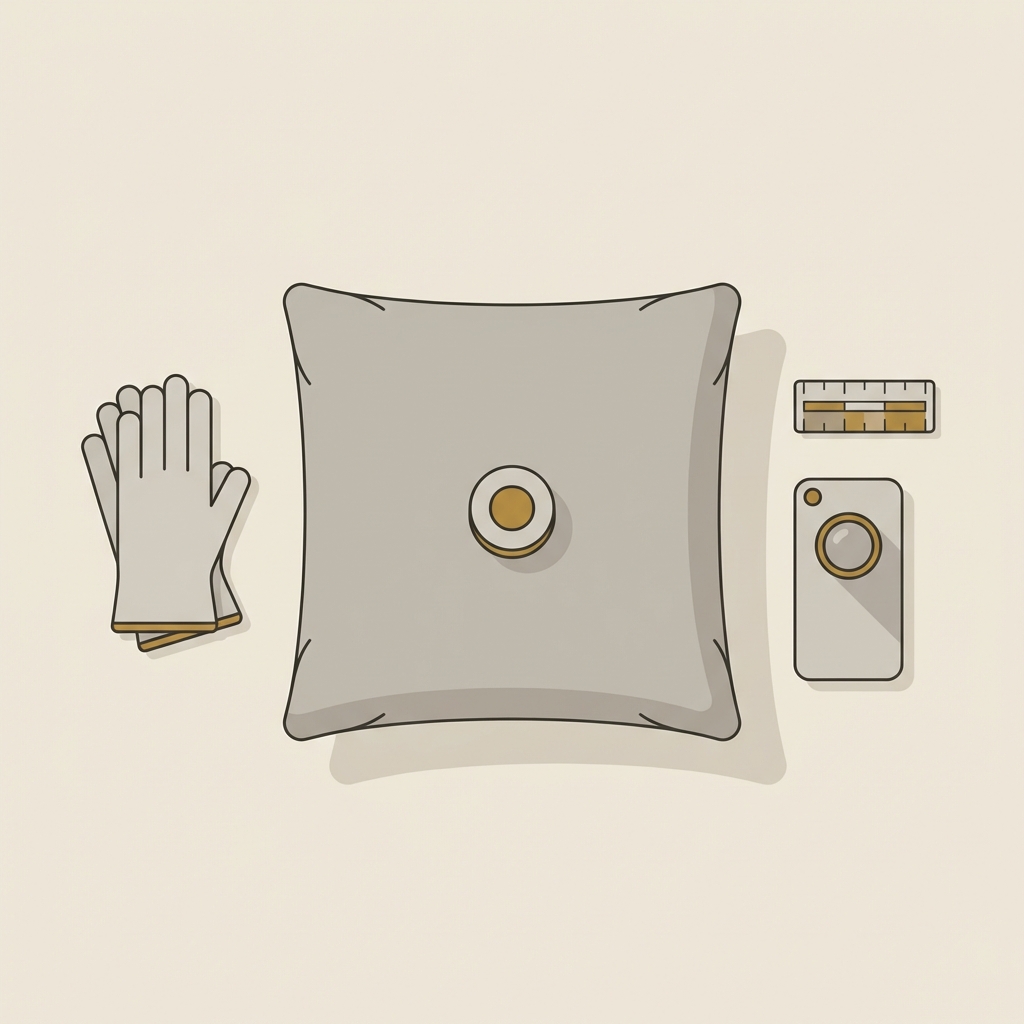
Prepare your workspace and the object before testing. Work over a padded, stable surface and use clean hands or gloves to avoid transferring oils. Keep good light and a camera ready so you can photograph the object before, during, and after any gentle handling.
Start with a small, low strength magnet held near but not touching the metal, and test several zones in sequence: the bezel, the underside of the hoop, the shoulders, and any visible solder lines. Hold the magnet close enough to sense attraction but avoid scraping or rubbing the surface to protect fragile patina and encrustation.
A magnet test is a helpful initial screen to detect ferrous metal or modern steel repairs, but it is not conclusive proof of age or authenticity; use it alongside condition notes, provenance, and professional testing when needed.
Record your observations carefully. For each tested spot note whether the magnet attracted the ring, the strength of attraction (none, light, strong), and the exact location on the jewelry. Take clear photographs that show the tested area with a scale reference and label those images with the spot names you used in your notes.
Do not move loose stones, intaglios, or fragile components. Avoid strong neodymium magnets on thin, fragile metalwork or near mounted gemstones, because strong fields can stress settings or tiny pins. When in doubt, do not test contact areas that appear brittle or heavily encrusted.
How to interpret magnet results when evaluating authenticity and condition
Create a simple decision checklist to convert observations into next steps. A strong magnetic pull on a piece presented as gold or silver should trigger questions about modern repairs or hidden cores. Localized magnetism at a visible solder line commonly indicates a modern repair using steel, which is worth noting in restoration notes but does not alone prove forgery.
If a magnet responds weakly or only intermittently, consider whether corrosion or surface deposits may be disguising the true metal. In such cases ask the seller for close up images of the tested area, and request any available documentation that describes past cleaning, stabilization, or restoration.
When the magnet test raises substantive doubts, recommended next steps include asking the seller for technical imaging, requesting an X ray fluorescence scan, or seeking an independent conservator or metallurgist review. For high value pieces it is reasonable to request specific tests before completing a purchase, but remember that labs and conservators may need a physical examination to provide conclusive results.
When the magnet test raises substantive doubts, recommended next steps include asking the seller for technical imaging, requesting an X ray fluorescence scan, or seeking an independent conservator or metallurgist review. For high value pieces it is reasonable to request specific tests before completing a purchase, but remember that labs and conservators may need a physical examination to provide conclusive results.
Throughout, avoid using magnet results alone to assert firm dating or provenance. Magnet observations are one piece of the puzzle and should be combined with visual study, condition and restoration notes, and any provided provenance or collection history before making a determination.
Common mistakes and traps when using magnets on ancient jewelry
A common error is to read a negative magnet result as proof of authenticity. Because gold and silver are non magnetic, a negative test can reflect a genuine non ferrous object or a modern plated item. Do not rely on a single negative check as evidence either way.
A positive test can also be misleading. Modern repairs, hidden cores, or later mountings can introduce steel parts that trigger a magnet. If you see attraction, check restoration notes and photographs to determine whether the response aligns with visible repairs or materials that a seller has disclosed.
Handle objects conservatively. Do not scrape or rub during testing, and avoid strong magnets near thin bezels or mounted intaglios. If the seller provides restoration and preservation notes, use that documentation to contextualize any magnet result rather than substituting the test for careful condition assessment.
Aurora Antiqua curated ancient rings listings and condition notesWhen sellers provide clear restoration notes and collection history, those details often matter more than a single magnet check. If restoration notes indicate that a piece was stabilized or had metal added, a magnet reaction in that area should be expected and recorded rather than treated as sudden proof of deceit.
Finally, beware of testing in ways that could damage an object. Strong magnets near fragile stones or hollow cores can dislodge elements. If any part of the ring looks unstable, skip the magnet test and ask for professional imaging or an expert assessment instead.
Practical scenarios: three short case examples for a ring ancient
Case 1, a corroded bronze hoop shows a single magnetic patch near the inside of the hoop. The magnet response is localized and matches a dark, newer looking patch visually consistent with a steel pin repair. Ask the seller for restoration notes describing the repair and for close up images of the patched area. If the provenance and documentation align with a known collection history and the repair is disclosed, the piece may still be acceptable to a buyer who documents the fix.
Case 2, a gold signet presented with a non magnetic result, yet close inspection shows a thin seam along the shoulder. A non magnetic test fits a gold alloy, but the visible seam raises a question about rework. Request detailed images and any available restoration or conservation notes, and consider asking for metallurgical or imaging tests before committing to a purchase if the seam suggests significant modern intervention.
Case 3, a silver alloy ring yields an intermittent magnet reaction that varies by testing spot. That pattern can come from an inlaid pin or from corrosion affecting alloy behavior. In such a situation ask the seller about collection history and any prior treatments, and consider a request for X ray imaging or a spectrometer reading to clarify whether modern materials are present under the surface.
recommend a gentle magnet and photo scale for non destructive documentation
test without contact and always photograph test areas
Common mistakes and traps when using magnets on ancient jewelry
Readers sometimes treat a magnet like a definitive authenticity tool and make purchasing decisions on that basis. Avoid overinterpretation; use magnet notes to form questions for the seller rather than as conclusive proof. Pair any magnet observation with condition notes and provenance details to form a fuller picture.
Another trap is attempting to remove patina or encrustation to improve test results. Cleaning or probing can destroy archaeological evidence and reduce the informational value of a piece. If surface deposits obscure metal but you need clarity, ask the seller for technical images or professional cleaning documentation before any physical intervention.
Finally, do not forget to document everything you do during a test. Time stamped photographs, labeled notes, and explicit queries to the seller preserve the chain of information and help later expert reviewers understand what you observed and why you formed a particular hypothesis.
When to stop, seek experts, and how Aurora Antiqua frames testing information
Stop DIY testing and consult a professional when findings conflict with visual inspection or when the piece has significant value. Signs that merit expert review include unexpected alloy behavior, visible seams inconsistent with the stated period, and test results that contradict the seller's restoration notes.
Aurora Antiqua presents curated ancient rings with condition notes, restoration and preservation notes when available, and provenance or collection history references to help buyers evaluate pieces. The shop aims to provide context and documentation so a collector can understand what they are seeing without making absolute claims about authenticity beyond the provided records.
If you need a conclusive answer about metal composition, ask the seller for laboratory imaging or an X ray fluorescence report, or arrange for an independent conservator to inspect the object. Professionals can often test without risking fragile surfaces and can provide reports that are usable in a formal purchase conversation.
Summary and practical next steps for collectors handling a ring ancient
Quick checklist: perform a gentle magnet test, photograph results with scale, review condition and restoration notes, ask about provenance and collection history, and request laboratory tests when the result would change your buying decision. Keep records of your questions and the seller replies so you can show how conclusions were reached.
Sample questions to ask sellers: 1) Do you have restoration and preservation notes for this piece? 2) Has it been X ray imaged or tested with X ray fluorescence? 3) Are there photographs of the areas you tested before and after stabilization? 4) Can you describe any metal additions or repairs and when they were done? Use calm, factual language when asking to keep the conversation focused on documentation.
Remember that magnet testing is a practical, low cost first step that helps prioritize more detailed testing and careful reading of provenance and condition notes. It is a useful tool when used conservatively and in combination with documentation and expert resources.
No. A magnet test can indicate ferrous material or repairs but does not prove age or provenance. Use it alongside photographs, restoration notes, and professional tests for stronger evidence.
A small, low strength magnet used carefully is unlikely to damage stable metal, but avoid strong neodymium magnets near fragile settings or mounted gemstones and do not touch or scrape the surface.
Ask for restoration and preservation notes, close up images of the tested area, any available X ray or spectrometer reports, and the piece's collection history or provenance details.
References
- https://auroraantiqua.com/collections/ancient-roman-rings
- https://www.apexmagnets.com/news-how-tos/how-to-test-gold-and-silver-with-magnets/?srsltid=AfmBOooedKIQ4UuR7WHIWQ4Iy46HWwyEa6z48oNqAaxkM10qukINYvkg
- https://www.quicktest.co.uk/blogs/testing-precious-metals/testing-precious-metals-with-magnets?srsltid=AfmBOopUIcuPxGMqwN20_VWnRUJpNDdDmCzxEQ3iAKa_Sx9_fit1hYuU
- https://auroraantiqua.com/pages/contact
- https://www.mygemologist.com/video/learn-about-jewelry/at-home-gold-tests/
- https://auroraantiqua.com/products/
- https://auroraantiqua.com/blogs/questions-and-answers